If you’re unlucky enough to have a dynamic IP address from your ISP (most common with residential users) but still want to use VPN, you have two choices. First, you can constantly change your VPN settings when your home IP changes. That isn’t very scalable though. Not to mention you’ll notice your home IP changed the moment you aren’t there, need VPN and can’t connect. The second option is to use a DynamicDNS solution.
What is DynamicDNS? It’s a cloud service where your UDM will watch it’s public IP address. If it ever changes, it uses a standard protocol to tell the DynamicDNS provider that your IP changed. The provider them provides you with a DNS record that will always resolve to your dynamic IP.
I’ve been using NoIP as my provider for years with no issues, so that’s the one I’m going to show you how to configure today.
Setup your NoIP account
Step 1: Register for an account with NoIP. (Clicking this link will give me a referral bonus)
Step 2: Go to DynamicDNS -> No-IP Hostnames (direct link)
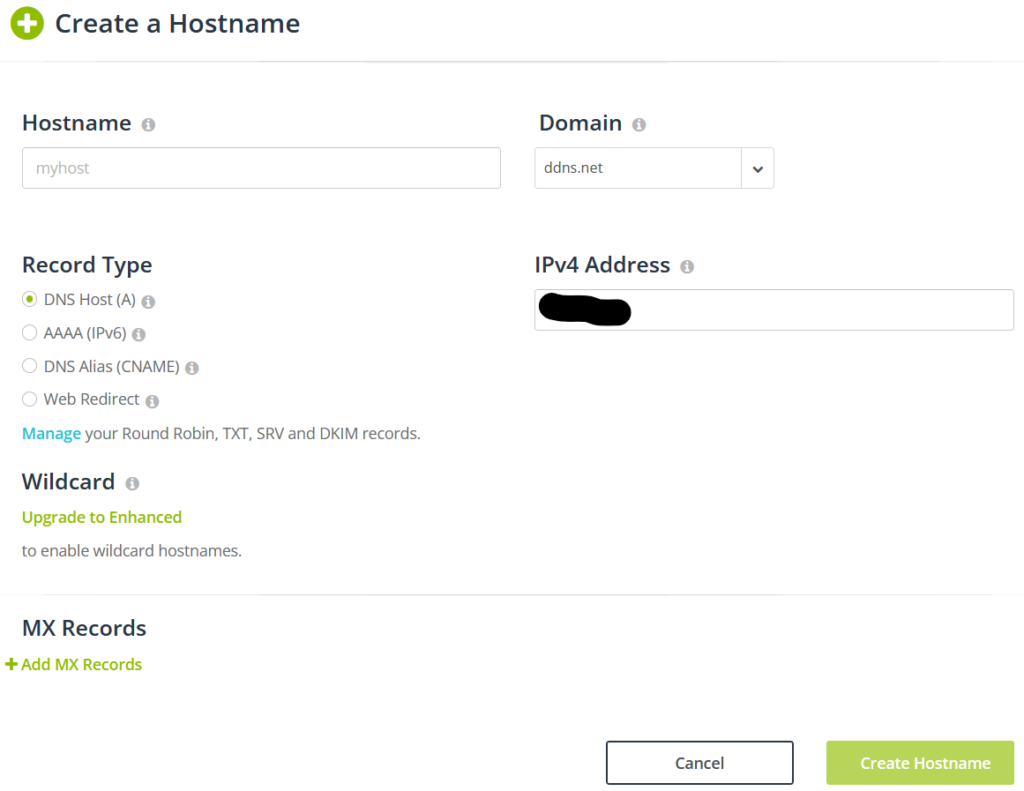
Step 3: Fill out the form. Choose your hostname and domain. Record type should be “DNS host (A)” then click “Add Hostname”
Configure your UDM to use NoIP Dynamic DNS
Step 1: Login to Unifi (https://unifi.ui.com) and go to the Network application.
Step 2: Go to Settings > Internet
Step 3: Click on the WAN interface you want to configure
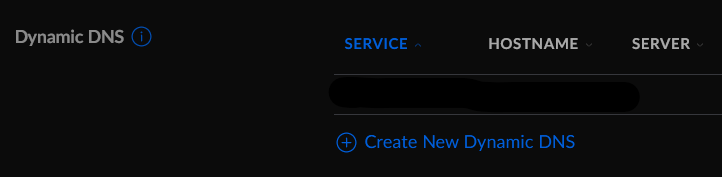
Step 4: Change “Advanced” to “Manual”. Then under Dynamic DNS, click Create new Dynamic DNS
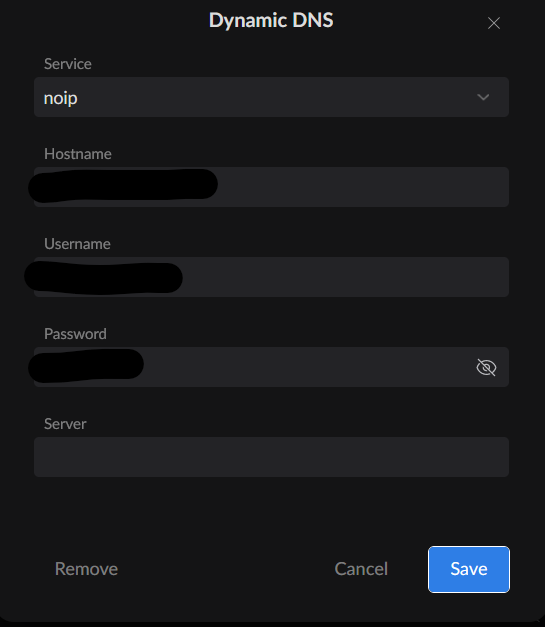
Step 5: Fill out the form. Select NoIP from the “Service” dropdown, enter your custom URL, username and password. You can leave “Server” blank. Click “Save”.
Step 6: Finally, click “Apply Changes”. All set. Your DynamicDNS URL will now be automatically updated when your WAN IP changes.